
The Board Is Funded. Now What?
The grant came through, the sponsor said yes, and production is underway. This is the moment most playground committees, school boards, and park directors finally exhale. Months of fundraising, pitch meetings, and design reviews have paid off. However, the physical arrival of your hardware is not the finish line; it is the beginning of the most critical phase of the project. The ultimate success of your inclusive playground project relies entirely on proper execution during the communication board installation phase.
How your board is placed, anchored, and oriented determines whether it becomes a vibrant, daily tool for connection or a piece of overlooked park background. To ensure your investment delivers on its promise of accessibility, you must approach the communication board installation process with the same rigor you applied to securing your funding.
Maximizing Impact Through Strategic Communication Board Installation
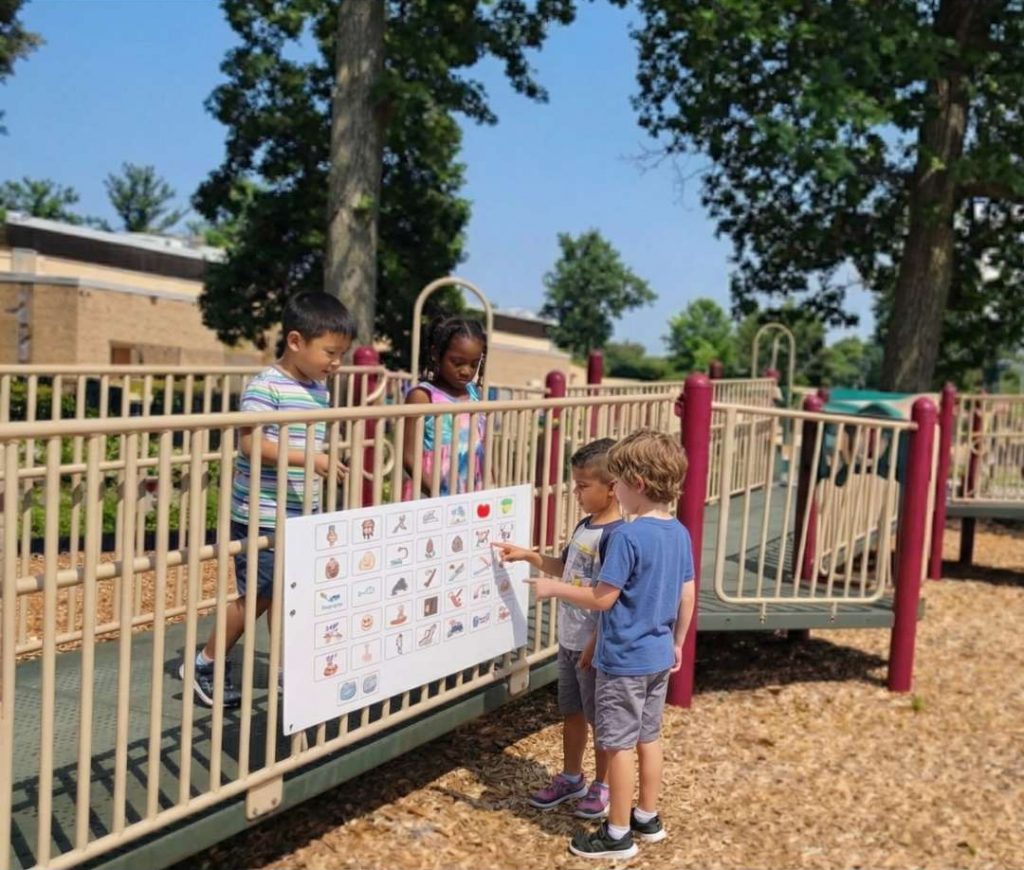
Where you place your board dictates how often it will be used. It is a common mistake to relegate these boards to the perimeter of a park simply because it is easier to dig post holes near an existing fence line. However, accessibility requires centrality. A board placed too far from the action becomes an isolated monument rather than an interactive tool.
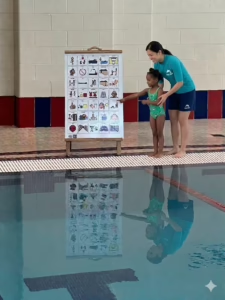
The board needs to go where children already naturally congregate—near the main entrance, adjacent to the most popular inclusive play structures, or at a central gathering point where paths converge. This principle applies just as much to aquatic environments, pool areas, and splash park layouts as it does to traditional mulch or poured-in-place rubber playgrounds.
If children have to leave the play zone entirely to express a thought or request a turn on the swings, the board is too far away. During your planning sessions, observe the natural flow of traffic on the playground to identify high-traffic zones where the board will be highly visible but will not obstruct the safe fall zones of adjacent equipment.
The 36-Inch Rule Is Not a Suggestion
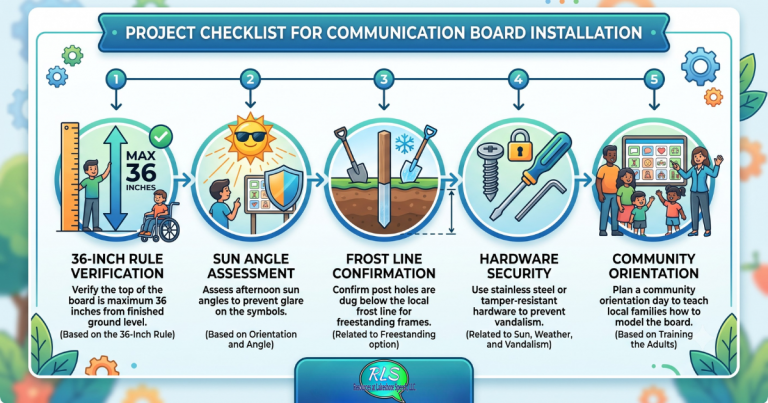
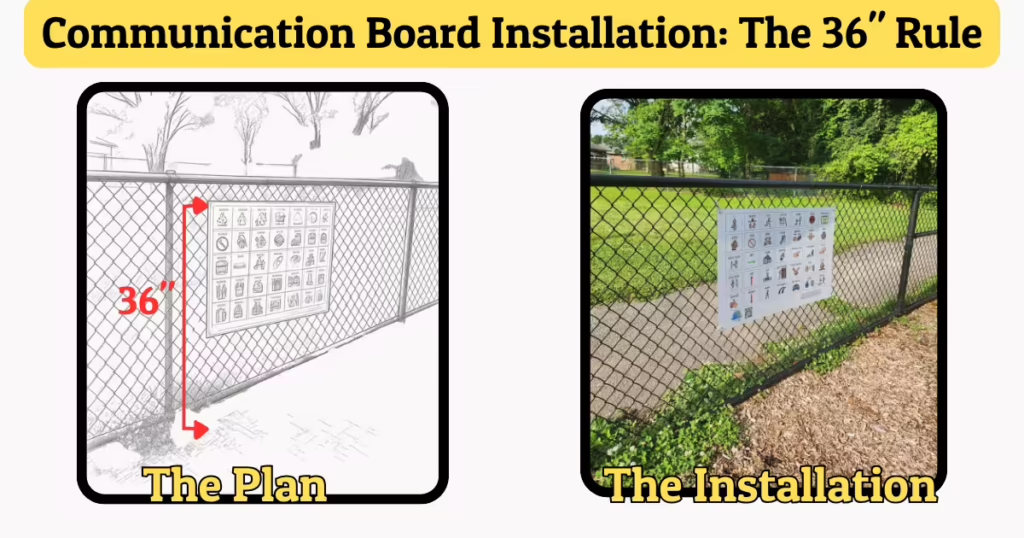
When executing a communication board installation, precision matters down to the inch. The single most important guideline we give every customer is this: the top of the board should be no more than 36 inches from the ground line. This specific installation height ensures the entire grid of symbols remains within the physical reach of wheelchair users, toddlers, and individuals of shorter stature.
The U.S. Access Board’s strict guidelines for accessible play areas support this benchmark directly, emphasizing that forward and side reach limits must be respected to accommodate all body types. If a board is mounted too high, the top row of core vocabulary icons—often containing crucial words like “help,” “stop,” or “go”—becomes entirely inaccessible to the very children who need them most.
Freestanding, Fence-Mounted, or Equipment-Mounted
Our heavy-duty boards are engineered to adapt to diverse environments, meaning your communication board installation can be executed in several distinct configurations depending on your site’s infrastructure.
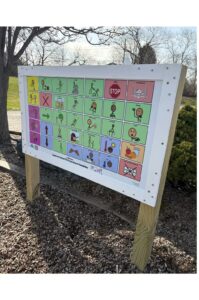
Freestanding Boards: Opting for a freestanding board set inside a ground-mounted aluminum or steel frame offers the highest level of flexibility. It allows you to control the exact location, orientation, and height without relying on existing structures.
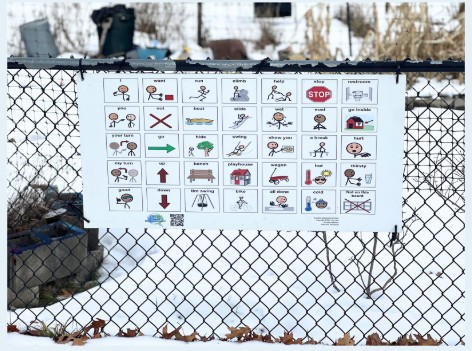
Fence-Mounted Boards: If your playground is tightly enclosed, utilizing a secure fence-mounted setup can save valuable square footage while keeping the board at eye level.
Equipment-Mounted Boards: Integrating the board directly into an existing play tower or sensory wall keeps the communication system embedded right in the middle of the action.
While we do not install the communication boards, we do provide communication board installation suggestions. We also recommend working with your building and grounds departments as they are experts in the structures and materials utilized for your specific playground.
Navigating Sun, Weather, and Vandalism
Outdoor environments are notoriously harsh on public infrastructure, which is why durability must be factored into your communication board installation strategy from day one. Our boards are built for outdoor permanence, manufactured from high-grade, non-glare aluminum protected by UV-resistant, weatherproof finishes and advanced anti-graffiti clear coats.
This same uncompromising durability standard applies across our full product line, including our specialized therapeutic riding center boards, which face extreme outdoor exposure, dust, and moisture daily. By ensuring your mounting hardware is zinc-plated or stainless steel, you prevent rust streaks and structural degradation over years of exposure to rain, snow, and intense summer heat.
Planning for Proper Orientation and Angle
A successful communication board installation accounts for the movement of the sun. A board that faces directly into the blinding afternoon sun becomes unreadable during peak park hours due to glare, casting shadows that obscure the symbols.
Before mixing any concrete or drilling into fences, visit your installation site at multiple points throughout the day—specifically mid-morning and late afternoon. Look at how the light hits the proposed location. Adjusting the angle of the frame by just fifteen or twenty degrees can drastically reduce glare and increase readability. Remember: a board mounted at the perfect physical height but facing an blinding angle still creates an unnecessary barrier to communication.
Training the Adults Who Will Model the Board
The physical communication board installation is only half the battle; the social installation is what gives the board life. A one-hour orientation session for school staff, park rangers, and local parents is a worthwhile investment that we support directly.
Our comprehensive guide to encouraging communication board use covers how adults can model the board naturally during play. Children learn augmentative and alternative communication (AAC) by seeing others use it. When parents, speech-language pathologists, and peers point to the symbols while talking (“Look, I am going to the slide!”), they validate the system and show children how to navigate the grid.
Document the Installation and Celebrate It
Once your communication board installation is complete, document the results thoroughly. Take clear, high-resolution photographs of the board from multiple angles, verify and document the correct installation height for your records, and capture joyful photos of children interacting with the symbols.
These photographs serve multiple purposes. They become the evidence base for your next inclusive community funding application, demonstrating to stakeholders that their money was well spent. Furthermore, they provide excellent promotional content for your official ribbon-cutting celebration, building community awareness and inviting families from neighboring areas to come utilize your newly accessible facility.
If you are ready to take the next step in transforming your community space, request a free quote today. Let our team walk you through every phase of the journey—from custom graphic design and symbol selection to precise communication board installation guidance and long-term maintenance strategies.